A bank statement may look like a dull PDF filled with numbers, dates and cryptic codes, but it is actually the single most powerful document in your personal finance toolkit. Skipping it means missing hidden fees, overlooking fraudulent charges and losing out on easy savings every month. When you learn to read your bank statement without nodding off, you gain control over your cash flow, reduce unnecessary expenditures and shield yourself from identity theft. Below, you’ll find a detailed reality check on why ignoring statements costs real money, a 60-second map of every line, box and code on the page, a “No-Nod” toolkit that keeps you alert, a five-step review routine to finish in under ten minutes and automation hacks so the work practically does itself. By the end, you’ll approach each statement like a forensic accountant but with zero yawns.
Most people think a bank statement is a “nice to have” after the month ends, not realising how quickly small errors and fees add up. Overdraft penalties in the form of “junk” fees often slip under the radar: a single $35 fee might seem minor, but four such fees in one year cost $140 – enough to cover a full tank of gas or several meals. Meanwhile, fraudulent card swipes can drain hundreds of dollars before you even notice. If you do not spend a few concentrated minutes reviewing each month’s activity, you surrender financial control to banks and fraudsters alike. Ignoring your bank statement is akin to leaving your front door wide open and hoping no one steals. Worse, it deprives you of spotting patterns in spending habits (for example, recurring subscriptions you forgot about) that could free up hundreds of dollars a year for savings or debt repayment. Attention to detail on a single PDF can literally save you thousands in the long run.
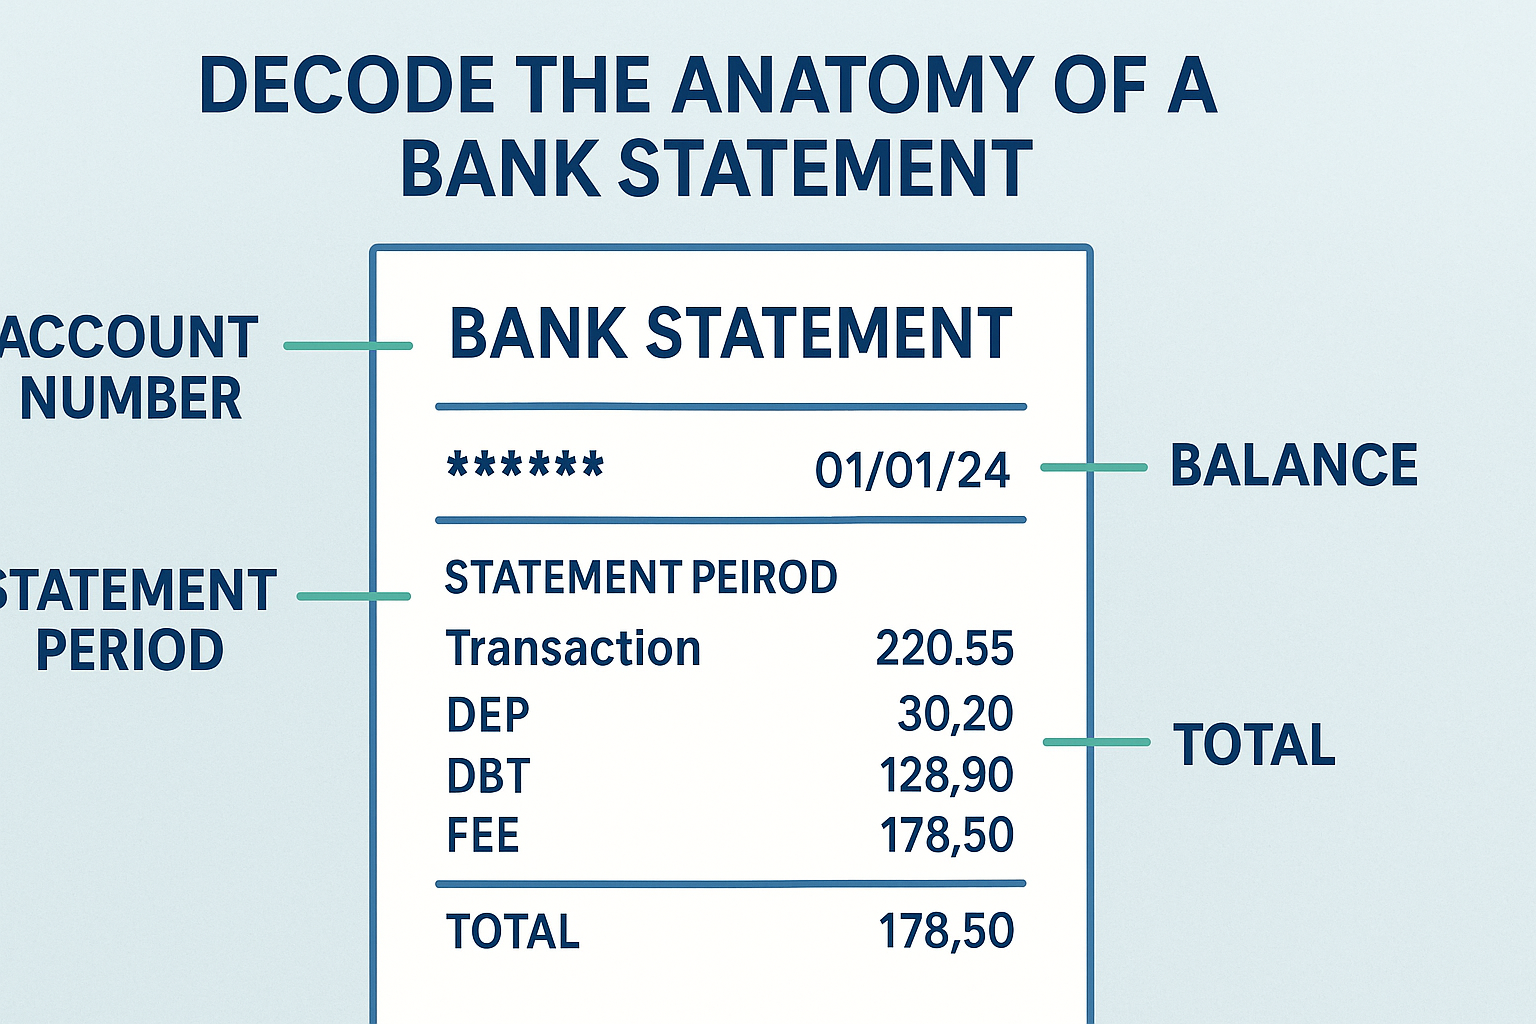
Inside every bank statement, each line has a story if you know how to decode it in 60 seconds. Column One usually lists the date in MM/DD/YYYY format. Column Two often shows a transaction code (for instance, “POS” for point-of-sale purchase, “ACH” for automated clearing house, or “XFER” for internal transfer). Column Three is the description: bank name, merchant name, ATM location or ACH originator. Column Four is the amount, often with negative numbers for debits (purchases, fees) and positive numbers for credits (deposits, interest). Column Five displays the running balance after each transaction. At the top of the first page, you’ll find the account number (often obfuscated except for the last four digits), statement period (start and end dates), beginning balance and ending balance. Some statements include a box for “Available Balance” (current funds accessible by ATM or debit card), which can differ from the “Ledger Balance” (actual balance after all transactions post). In the footer, look for subtotal lines “Total Deposits”, “Total Withdrawals”, “Total Fees”, “Monthly Interest Earned” and similar summaries. Scanning these elements takes under a minute once you know what each represents. The following table breaks down a typical five-column layout:
| Column or Box | What It Shows | Why It Matters |
|---|---|---|
| Date (MM/DD/YYYY) | When the transaction posted | Identifies timing for catching duplicate or unauthorized charges |
| Transaction Code (e.g., POS, ACH, ATM) | Type of transaction | Helps distinguish between purchases, electronic payments and internal transfers |
| Description (Merchant or Source) | Where money came from or went to | Reveals subscription services, ATM withdrawals, merchant details for spotting fraud |
| Amount (Debit as negative, Credit as positive) | Exact dollars moved in or out | Allows quick tallies of spending vs. deposits and flags unusually large transactions |
| Running Balance | Balance after each transaction | Ensures every transaction is accounted for and helps detect math errors or missed entries |
| Beginning Balance | Balance at the start of the period | Starting point for verifying your financial status season-over-season |
| Ending Balance | Balance at the end of the period | Confirms that deposits, withdrawals and fees match your records |
| Available Balance (if shown) | Funds accessible immediately | Prevents overdraft surprises when pending transactions cause a mismatch |
| Subtotals (Total Fees, Total Deposits, etc.) | Summaries of grouped amounts | Quickly answer questions like “How many dollars went to fees this month?” |
Once you recognize each piece of data, you can breeze through the page without getting lost in that endless stream of digits. But even with a clear map, it’s easy to zone out. That’s where the “No-Nod” toolkit comes in: simple techniques to stay alert, sharpen focus and make the process almost game-like.
First, embrace the Pomodoro twist: set a 3-minute timer to review one statement. Knowing there’s a ticking clock creates urgency and wards off drowsiness. Combine that with an audible clicker or pen tape each time you verify a transaction; click or tap. The physical motion re-engages your brain. Next, use high-contrast highlighting: assign a neon colour to all debits over $50, another colour to any merchant you don’t immediately recognize and a third colour for fees. The bursts of colour pull your eyes away from the grey sameness of columns. If you notice a coloured line, you’re forced to pay attention. Third, involve your body: stand or sit on a stability ball rather than a chair, or do calf raises between every ten lines you check. Light physical movement increases blood flow, sharpening mental acuity. Fourth, read aloud key line items in a whisper. Your ears amplify the information, making the task interactive rather than passive. Finally, recruit a short, catchy mantra: “Check. Click. Confirm.” Every time you finish reviewing a row, mentally chant that phrase. It might sound silly, but mantras focus your thoughts and keep fatigue at bay. This “No-Nod” toolkit ensures you’re not skimming lines while half-asleep; instead, you remain fully present for each dollar that leaves or enters your account.
Now that you have the tools to stay awake and a 60-second map in mind, deploy a five-step review routine that takes under ten minutes (even if your statement spans 30 pages). Step One: Verify the starting and ending balance. Compare the “Beginning Balance” from last month to your own manual calculation (last month’s ending balance plus or minus any cheques, deposits and fees). If your math is off, something likely posted late or got miscategorised. Step Two: Scan for large or unusual debits. Using your highlighted colour for transactions over $50, look for any one-time charges. Did you buy airfare you forgot about? Did your gym membership auto-renew at a higher rate? These stand out immediately and usually warrant quick questions or follow-up. Step Three: Spot-check recurring payments. Look for identical descriptions (for example, “NETFLIX.COM” or “AMAZON PRIME”) to confirm each subscription is intentional and billed at the correct amount. If you see “SPOTIFY”, “HULU”, “NYT.COM” or any other service you no longer use, cancel it and reclaim that monthly fee. Step Four: Identify fees or interest charges. Banks love to bury “Monthly Maintenance Fee”, “Overdraft Fee”, “ATM Surcharge”, “Paper Statement Fee”, “International Transaction Fee” or “NSF Fee” within that long list. Each fee should either be explained by a corresponding deposit or withdrawal (for instance, an overdraft fee tied to a bounced cheque) or be waived. If not, call customer service to request a refund. Step Five: Review deposits and credits. Confirm your pay cheque or direct deposit matches expected amounts. If your payroll changed or you’re expecting a bonus, ensure it posted correctly. Check for interest earned. If you have a high-yield account, the interest line should reflect that rate. If it’s missing or lower than expected, talk to your bank about getting the right rate. Repeating these five steps month after month yields a clean audit trail. You’ll know within minutes if something is off, leaving you extra time to catch up on other financial tasks.
Automation hacks take your routine from minutes to mere seconds. Begin by enrolling in alert notifications via your bank’s mobile app or online platform. Set up push alerts for any purchase above a threshold you choose (e.g., $100), so you are notified instantly of big charges. Use spreadsheet-friendly downloads: most online banking portals allow CSV exports of transactions. Link that CSV directly to a simple spreadsheet template with built-in conditional formatting (such as flagging amounts over $50 or highlighting text patterns like “FEE” or “ACH”). Each month, download and drop the file into the template; your pending flags and summaries appear without manual highlighting. For merchants that send e-receipts, forward receipts to an email folder called “Bank Receipts”, then use an email rule that scans for transaction amounts. Cross-check that list against your bank’s CSV to auto-detect mismatches. Finally, consider a third-party budgeting app (such as one that supports read-only access) that automatically categorises transactions and alerts you to unusual activity or overspending in a category (like “Dining Out” or “Subscriptions”). With these automation hacks, the only manual step is glancing at your phone or spreadsheet to confirm everything is clean; no digging through pages is required.
Putting it all together, here is how a typical 8-minute month-end check might unfold:
-
Open the PDF, note the beginning balance, and glance at the ending balance (30 seconds).
-
Export transactions to CSV and drop them into the spreadsheet template (30 seconds to upload; 1 minute for conditional flags to populate).
-
Scroll the printed page (or digital copy) with a clicker, whispering “Check. Click. Confirm.” (2 minutes through debits, spots for any flagged line).
-
Quickly inspect flagged recurring payments against your subscription list (1 minute).
-
Verify fees with highlighted colour; call the bank if any surprise charges appear (1 minute).
-
Confirm deposit amounts against pay stubs in your email receipt folder (30 seconds).
-
Review the automation-generated summary (30 seconds).
By minute eight, your bank statement is fully vetted. If there are no flags, you log that you’re done and feel confident about your cash flow. If something is off – say, an unexpected $75 “ATM Surcharge” – you already know the exact line number, date and description to dispute.
Reading your bank statement with speed and precision is a micro-habit that compounds. See it as a radar: it picks up every ping (authorised or not) in your financial ecosystem. When done consistently, you will catch every recurring subscription hike, every bank fee that should have been waived and every fraudulent swipe before it’s too late. Over a year, this process often saves proactive readers hundreds of dollars – money that can be redirected to savings, investments or simply a more restful night’s sleep knowing your checking account is under control.
Below is a sample of how a conditional-format spreadsheet might flag key fields. (Note: The sample data is fictional.)
| Date | Description | Amount | Balance | Flag |
|---|---|---|---|---|
| 06/01/2025 | ACME Corp Payroll | +$2,500 | $2,500 | |
| 06/02/2025 | AMAZON PRIME SUBSCRIPTION | -$14.99 | $2,485.01 | Recurring Subscription |
| 06/03/2025 | STARBUCKS | -$6.75 | $2,478.26 | |
| 06/04/2025 | ATM Withdrawal WORLDWIDE | -$75.00 | $2,403.26 | Fee (ATM) |
| 06/05/2025 | NETFLIX | -$15.49 | $2,387.77 | Recurring Subscription |
| 06/06/2025 | FEE OVERDRAFT CHARGE | -$35.00 | $2,352.77 | Fee (Overdraft) |
| 06/07/2025 | PAYPAL | -$120.00 | $2,232.77 | Large Debit |
| 06/08/2025 | INTEREST EARNED | +$1.12 | $2,233.89 | |
| 06/10/2025 | ACH CREDIT IRS TAX REFUND | +$500.00 | $2,733.89 |
In this example, the conditional formatting highlights any “Fee” in one colour, “Recurring Subscription” in another, and “Large Debit” in a third, instantly drawing attention to potential problem areas. If “Netflix” or “Amazon Prime” are no longer wanted, you spot them immediately and cancel. If “ATM Withdrawal Worldwide” appears, which you did not authorise, you jump on it before the bank completes reconciliation. That single month’s review took minutes, not hours.
Mastering your bank statement is not just about eliminating fees and fraud; it also surfaces hidden savings. By logging the total amount paid in overdraft or maintenance fees over a year, you might discover you’re eligible for a no-fee account or a higher threshold before the bank charges. By noting that your checking account paid virtually zero interest, you may decide to move funds to a high-yield savings or money market account for an extra 4% annual return. That decision could translate into hundreds of dollars earned instead of lost. In short, a quick monthly audit of your statement yields both defensive (fee avoidance, fraud detection) and offensive (interest maximisation, subscription control) benefits.
Remember that banks count on your apathy. Their revenue model includes idle account fees, overdraft spikes and subscription partners. When you flip that script and spend a few minutes each month on your statement, you regain negotiating power. Call your bank and point out the “Monthly Maintenance Fee” you had forgotten you were being charged; request a waiver or switch to a digital-only account with no fees. Spot an unexplained “international transaction fee”? Demand an explanation; often the bank will refund it automatically. Once the bank realises you’re an attentive customer, they treat you differently, offering lower fees, higher interest rates or targeted perks.
As you incorporate this micro-skill, it becomes a habit. Set a recurring calendar reminder (or use your bank’s “Statement Ready” email notification) so that on the first of each month you know your statement is available. Spend no more than ten minutes, follow the five-step routine, use the “No-Nod” toolkit and leverage automation. Over time, you might even reduce the review to three minutes because your spreadsheet and alerts have learnt your spending patterns. Soon, “reading your bank statement” will be as natural as checking the time.
Finally, measure the impact. In your budgeting or net worth spreadsheet, add a line called “Monthly Statement Audit Savings”. Each time you catch a waived fee, an unexpected refund or a better interest rate, log the dollar amount. Watch how those small wins accumulate: 12 waived fees at $35 each equal $420 per year. Moving $5,000 from a zero-interest checking to a 4% savings account yields $200 annually. Cancelling a forgotten $12 monthly subscription saves $144 per year. These line items stack up into a meaningful boost to your financial health – a pure reward for ten minutes of focused work each month.
With this approach, reading your bank statement transforms from a chore to a catalyst. You stay alert, interrogate every line, eliminate unnecessary charges, detect fraud and redirect money toward your goals. There are no extra headings to learn and no new software required – just a clear system you can master in minutes. Follow the five-step routine, use the “No-Nod” toolkit, lean on automation and track your savings; before long, reading your statement will be one of your most powerful personal finance habits.
Why Bother? Three High-Stakes Reasons to Read Every Statement
Silent Fee Creep
Overdraft and non-sufficient funds (NSF) fees accumulate in stealth mode. In 2024, consumers in India paid a staggering ₹1 trillion (US $12.1 billion) in these charges†. Each time a purchase or bill posts when your balance is low, the bank may trigger an overdraft fee, often ranging from ₹500 to ₹1,000, without immediately notifying you. That “gentle reminder” email or SMS rarely highlights the full consequences. Instead, it simply shows up as a line item buried among dozens of other transactions.
-
How fee creep works: Suppose you maintain an average balance of ₹5,000 but have a recurring subscription for ₹699. On a month when direct deposits lag by a day, your balance dips below zero momentarily. The bank’s system registers a negative ledger balance at 11:59 pm, triggering an overdraft fee before your pay cheque clears the next morning. You might not notice until you see the bank statement two weeks later.
-
Compound impact: One overdraft fee may seem trivial, but four in a year equal nearly ₹4,000, enough for a modest emergency fund contribution or a high-interest deposit. Instead, that money vanishes into bank revenue. Multiply that by millions of account holders, and you reach the ₹1 trillion mark. Silent fee creep quietly erodes your savings, often without any overt notice.
-
Reading for fee detection: By scanning each statement line by line, you identify patterns of multiple ₹500 debits labelled “ODFEE” or “NSF”. Once spotted, you can call customer service to dispute fees you believe were unfairly applied, ask for a waiver, or switch to a no-fee account. Detecting fee creep early transforms hidden bank profits into reclaimed income.
Early Fraud Detection
Fraudulent charges can strike at any moment, but they usually reveal themselves first on your monthly statement. According to a J.D. Power survey, 29 percent of customers experienced account fraud in the past 12 months†, with younger users often targeted via unauthorised digital transactions. Stopping fraud before it escalates is the cheapest and most effective defence.
-
First odd debit: Imagine scrolling through an online shopping spree transaction and spotting a ₹1,999 debit to “SHOPXYZ ONLINE”, a merchant you never visited. That single line, left unchallenged, might signal the start of a ripple effect: card info sold on the dark web, repeated unauthorised charges, and potential identity theft.
-
Rapid response: By flagging each unfamiliar description, especially those marked “POS” (point-of-sale), “ACH” (automated clearing house) or “INTL TX” (international transaction), you can freeze your card before further damage. Most banks allow you to dispute a fraudulent charge within 30 days; catching the first instance ensures any refund processes are faster.
-
Youth at risk: Younger demographics tend to use digital wallets and contactless payments more frequently, increasing exposure to phishing scams and compromised merchant databases. A quick monthly review of every debit, especially if language or location codes seem off, is crucial. Early fraud detection doesn’t just protect your current balance; it preserves your credit score and prevents a domino effect of unauthorised loans or account takeovers.
Budget Reality Check
Budgeting apps can provide estimated balances and alert you to overspending, but they rely on approximate algorithms and delayed transaction feeds. Only your official bank statement carries the legal ledger balance. One missed subscription renewal or a late-posting cheque can throw off aggregated forecasts, risking overdrafts or drained savings.
-
Aggregator app limitations: Popular budgeting tools often sync with banking APIs, but they categorise transactions based on merchant names and historical patterns. If a merchant renames itself (for instance, “STREAMLYF SUBS” becomes “STREAMLYF SVCS”), your app might misclassify or omit that charge until you manually reassign it. Similarly, a cheque you deposited may take three business days to clear; until then, the app shows an estimated balance higher than your actual available funds.
-
Official ledger discrepancies: The statement’s “Available Balance” reflects funds you can use immediately after pending holds clear, while the “Ledger Balance” shows your true financial standing once all transactions settle. Late-posting cheques, returned cheques, and pre-authorised payments can adjust your ledger balance without immediately updating in your budgeting app. Missing that nuance can derail a carefully planned expense category or emergency fund allocation.
-
Subscription or cheque example: Suppose you budget ₹1,000 per month for streaming services. An app may predict a ₹699 charge, but a price hike sends a ₹799 debit. If you rely solely on the app, you won’t know about the extra ₹100 until you see the bank statement, potentially overdrawing your account. Similarly, if you deposit a ₹10,000 cheque near month-end, your app’s estimated balance may count those funds immediately, but the cheque might bounce or clear late, causing unexpected reversals.
The table below highlights key differences between aggregator apps and your official bank statement:
| Feature | Aggregator App | Official Bank Statement |
|---|---|---|
| Balance Display | Estimated balance (may include pending) | Ledger balance (posts every transaction) |
| Transaction Timing | Real-time with occasional delays | Exact posting date (legal timestamp) |
| Transaction Classification | Based on merchant rules and AI algorithms | No classification of raw debit/credit entries |
| Fee Detail | May categorize as “Bank Fee” generically | Precise fee description (e.g., “NSF Fee”) |
| Cheque Clearing Status | Often shows as “pending” until cleared | Final status after clearing/return |
| Dispute Proof | Screenshots of app may not suffice | Official PDFs serve as legal evidence |
Failing to reconcile your budget against the official ledger means risking misallocated funds, unanticipated overdraft fees and derailed savings goals. A monthly reality check Comparing app forecasts with the real statement ensures your cash-flow plan remains on track.
Header Row
Account Name & Number – Every statement opens with the account name and number, but most of your checking or savings account number is hidden for security. Confirm the last four digits match the card or account details in your wallet. This quick check ensures you’re reviewing the correct account, which is especially important if you have multiple accounts or joint accounts. You might be looking at someone else’s financial activity and overlooking important warning signs in your own if the numbers don’t match.
Statement Period: Banks frequently employ a cycle that deviates slightly from the months of the calendar. The precise window of transactions covered is indicated by the “Statement Period”, which is usually from the 24th or 25th of one month to the 23rd or 24th of the following month. Comprehending this range is essential for deposit reconciliation, particularly for pay cheques or automatic transfers that occur at the end of the month. If you assume a statement runs from the 1st to the 30th, you might overlook late-posting transactions that fall into the next cycle. Always cross-check your employer or biller’s deposit/withdrawal dates against the bank’s cycle to ensure full visibility.
Transaction Ledger
Banks display each entry in a tabular “Transaction Ledger” format. To decode it in under a minute, focus on four key columns:
Date Column – There are two dates to distinguish: the actual transaction date (when you swiped your debit card or initiated an online transfer) and the posting date (when the bank records the transaction). Weekend or holiday transactions often post one or two business days later. A charge on Saturday might not appear until Monday afternoon, creating a temporary “pending” status. By glancing at both dates, you avoid misreading your balance and prevent surprise overdrafts.
Description – This field contains merchant codes, ATM IDs or abbreviated names (e.g., “NYK STKBPS” for New York Stock Exchange trading platform purchases, or “ATM ID 1234” for automated teller machine withdrawals). Familiarising yourself with merchant abbreviations helps you spot unauthorised or unfamiliar vendors quickly. If you see a description you don’t recognise, especially “INTL TX” (international transaction) or “ACH PPD” (automated clearing house payment), verify the source before letting it slide. Fraudulent transactions often appear under vague or slightly altered merchant names.
Debit/Credit – Debits (money out) typically appear as negative amounts or in a red font, while credits (money in) are positive or black. Scanning for large debits can instantly highlight unusual expenses, such as a one-time ₹5,000 electronics purchase you didn’t authorise. Conversely, credits like salary direct deposits or tax refunds show inflows. Many statements also tag “ACH Credit” for direct deposits and “ATM Withdrawal” for cash taken out. When a large debit or an unexpected credit appears, verify with your pay stub, merchant receipt or email confirmation to confirm accuracy.
Running Balance – Each entry’s “Running Balance” displays your actual cash position after that transaction posts. This figure differs from “Available Balance, ”which may exclude pending holds or recently deposited cheques that have not cleared. If your running balance dips near zero, it’s a red flag to hold off on discretionary spending until the next deposit. By tracking how the balance changes line by line, you ensure no transaction is missing or miscalculated. A mismatch between your own records (or budgeting app forecasts) and the running balance is a sign to dig deeper.
Below is a simple representation of a four-column ledger for clarity:
| Date | Description | Debit/Credit | Running Balance |
|---|---|---|---|
| 06/01/2025 | ACME Corp Payroll (ACH) | +₹25,000 | ₹25,000 |
| 06/02/2025 | STREAMLYF SUBSCRIPTION (ACH) | -₹699 | ₹24,301 |
| 06/03/2025 | ATM Withdrawal #1234 | -₹2,000 | ₹22,301 |
| 06/04/2025 | GROCERY MART POS | -₹1,250 | ₹21,051 |
Summary Box
Most statements include a compact “Summary Box”, often located toward the top or bottom of the first page, that aggregates key figures for the entire period.
Opening Balance – This figure should match last month’s “Closing Balance”. It represents the exact ledger balance at the start of this statement period. If your previous statement closed at ₹15,000, your current “Opening Balance” should also read ₹15,000. A mismatch suggests a late-posting transaction or an internal bank adjustment that bypassed your manual logs.
Total Deposits/Withdrawals – Instead of scanning each individual transaction to calculate inflows and outflows, the summary box offers a snapshot: “Total Deposits” might show ₹50,000, while “Total Withdrawals” reads ₹45,000. These aggregated numbers help you quickly assess whether you spent more or less than you earned. If you notice “Total Withdrawals” exceeding your budgeted amount, you can drill down into the transaction ledger to catch specific categories (e.g., dining out or subscriptions) that ballooned unexpectedly.
Closing Balance – This is your final ledger balance once all transactions in the cycle have posted. It should reconcile exactly with the running balance of the last entry in the transaction ledger. If the “Closing Balance” differs from the number in your budgeting app, the discrepancy often stems from pending holds or a late-clearing cheque. Always use this official figure when reconciling your budget, updating net worth trackers or planning discretionary spending.
Fine-Print Alerts & Messages
Below the summary box or on the last page, banks bury critical notices in the “Fine-Print Alerts & Messages” section. These could include service fee changes, interest rate updates or regulatory notices. For instance, if your institution implements new overdraft rules, such as charging only after three consecutive negative balance days, you’ll find that detail here.
-
Service Fee Changes: If your bank announces that the ₹300 monthly maintenance fee will increase to ₹400 starting next quarter, it appears in fine print, often in a section labelled “Notice of Fee Change”. Skimming this prevents unwelcome surprises when your subsequent statements show higher fees.
-
Interest-Rate Tweaks: Savings and checking accounts occasionally adjust interest rates based on market conditions or internal policies. A 0.5% rate on a high-yield savings account might drop to 0.25%, directly impacting your monthly interest credit. Spotting these adjustments in fine print allows you to consider moving funds to a competitor offering a better return.
-
Regulatory Notices: Banks must notify customers about compliance changes such as new know-your-customer (KYC) requirements or updated ATM withdrawal limits. Ignoring these messages can lead to blocked transactions or unexpected holds if your account isn’t fully KYC compliant.
Skimming the fine print takes under 30 seconds but can save you significant headaches. If you see a syllabus of changes to overdraft coverage or wire-transfer fees, take note immediately. These buried alerts often contain deadlines for opting out of certain services or switching to a different account tier.
By racing through these four segments – Header Row, Transaction Ledger, Summary Box and Fine-Print Alerts & Messages – you complete a comprehensive 60-second tour. Within that minute, you validate you’re on the right account, align posting dates with actual spending, tally inflows and outflows, and note any upcoming fee or policy adjustments. With practice, this rapid scan becomes a reflexive habit that keeps your finances tidy, fraud-free and operating at peak efficiency.
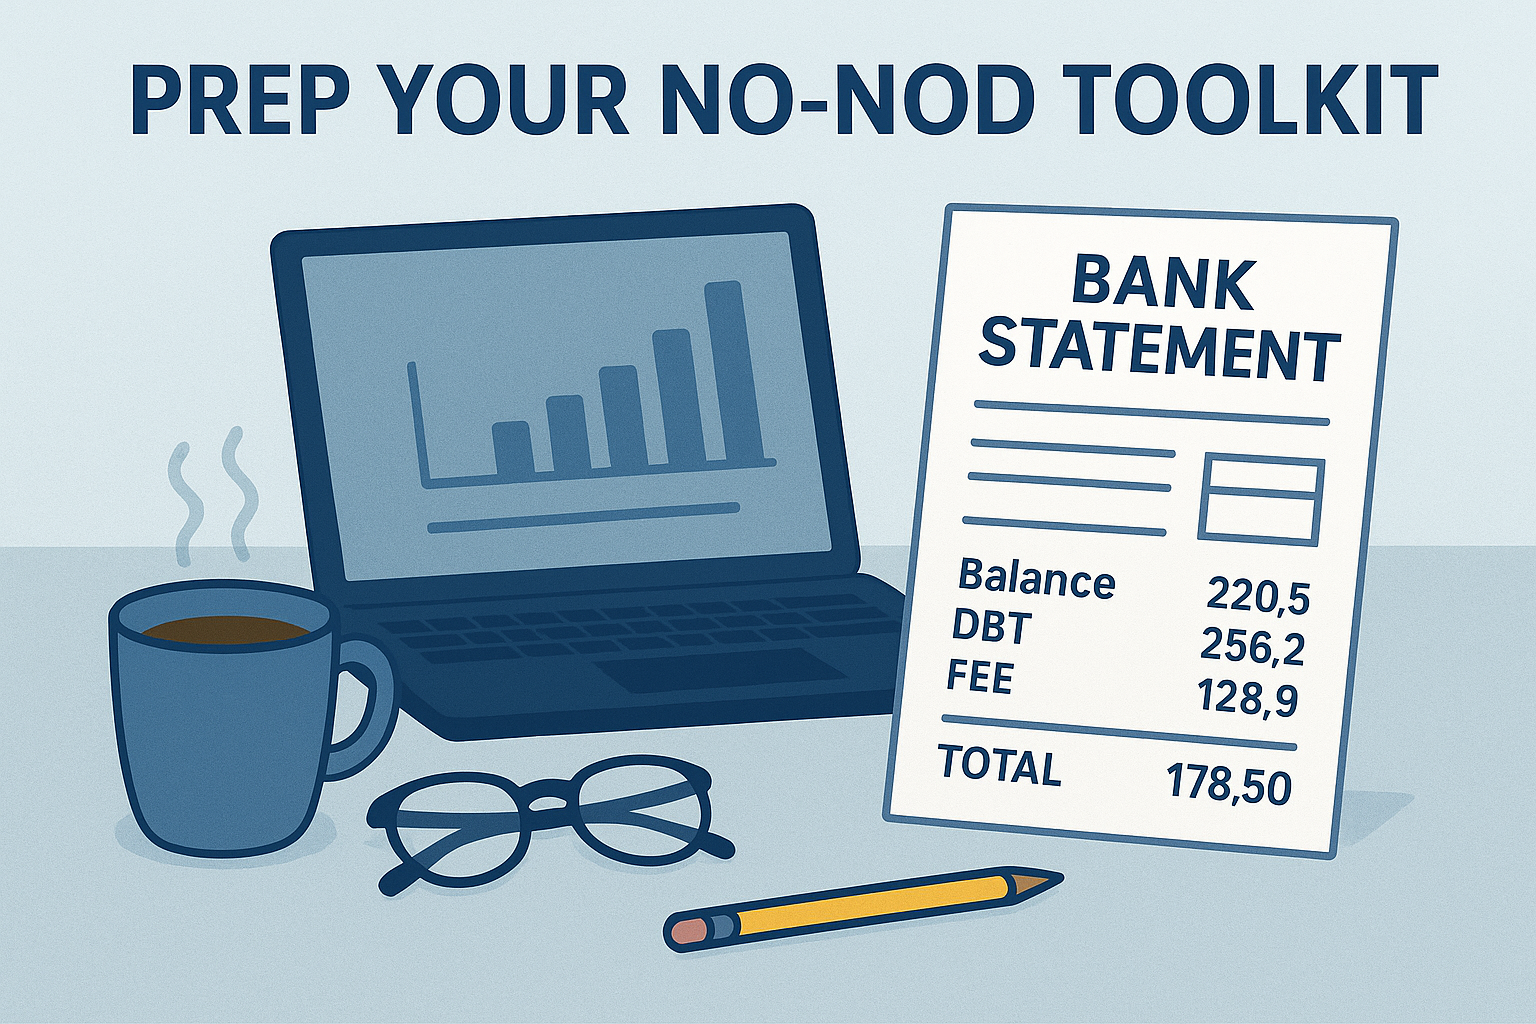
Prep Your “No-Nod” Toolkit
Highlighter Colors
Assigning distinct highlighter colours for different transaction categories accelerates pattern recognition. Choose one neon shade for fees (overdraft, ATM, maintenance), another for fixed bills (rent, utilities, insurance) and a third for discretionary spending (dining out, entertainment, impulse buys). When you skim a page of small-font transactions, bursts of colour naturally draw your eyes to potential problem areas without forcing a line-by-line read. For example, circling every fee in bright orange instantly reveals how much you’re losing to bank charges each month, while blue highlights on identical rent or mortgage debits confirm you’re paying the agreed-upon amount. Consistent colour-coding also trains your brain: after just a few statements, you’ll know at a glance whether that yellow mark represents a bank-imposed fee or a dinner splurge.
| Highlighter Color | Category | Purpose |
|---|---|---|
| Neon Orange | Bank & Overdraft Fees | Exposes hidden or repeated charges to dispute timely |
| Bright Blue | Fixed Bills | Verifies rent, mortgage, and utilities match the contract. |
| Vibrant Green | Discretionary Spending | Tracks nonessential expenses for budget adjustments |
Two-Screen Tactic
Opening your bank statement PDF on one monitor (or one browser tab) and a budgeting spreadsheet or expense-tracking app on a second screen slashes cognitive load. As you scan each highlighted transaction, you immediately update the corresponding line in your spreadsheet without toggling windows. Visually cross-referencing the bank ledger against your budget lets you catch discrepancies such as an extra ₹2,500 subscription instantly. Even if you’re using a laptop, splitting the screen so the bank statement occupies the left half and your expense tracker the right half creates the same effect. This side-by-side approach prevents mental fatigue caused by remembering numbers while switching contexts. Instead of losing focus while flipping between tabs, your eyes move horizontally across a continuous flow of information: transaction description on the left, budget category and variance on the right.
5-Minute Timer
Set a timer on your phone or computer for a five-minute “sprint” to review a single statement. When you know you only have to focus for a short, fixed interval, your brain releases dopamine as you complete micro-goals: scanning for fees, marking fixed payments and flagging anomalies. These bursts of intensity keep your attention from waning and turn the chore into a quick productivity win. Once the timer dings, take a 30-second break/stretch, grab water or do a quick shoulder roll before diving into the next statement. Over time, these brief intervals train your mind to process the same volume of data more quickly. Within four or five sprints (20–25 minutes total), you can thoroughly review a multi-page statement without zoning out.
5-Step Strategy: Read Your Bank Statement Without Zoning Out
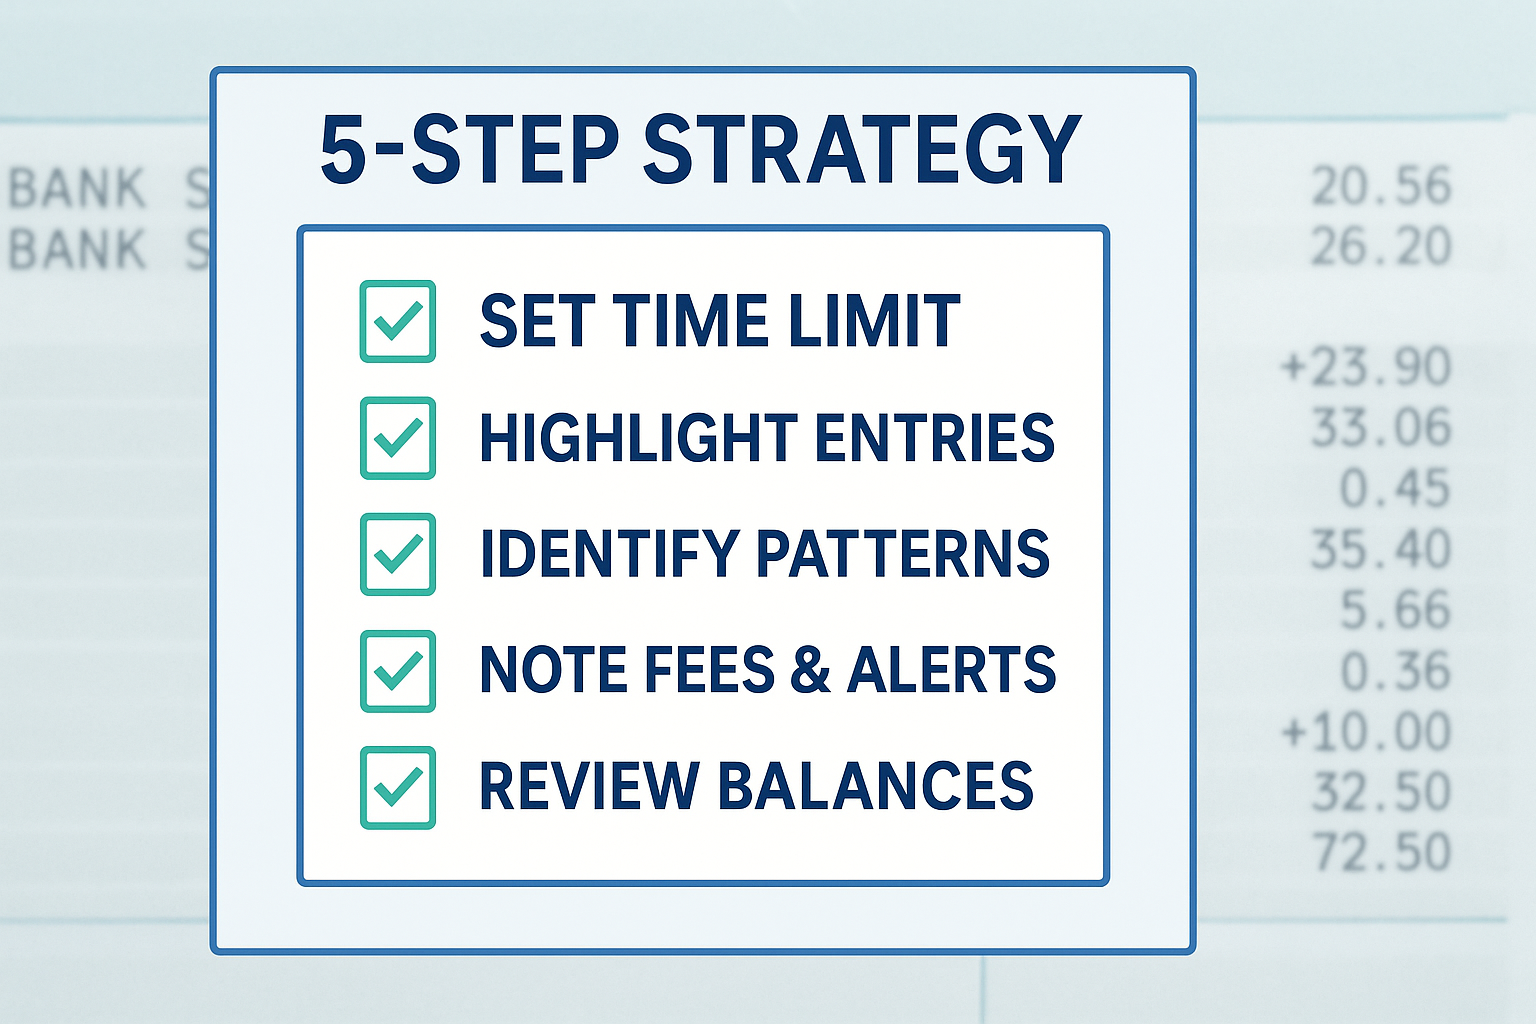
Step 1 – Quick Glance
Begin with a rapid, top-down sweep of your entire statement. Check if the final “Closing Balance” is negative or drastically lower than expected. Next, scan for any single withdrawal exceeding 20 percent of your monthly income; this could indicate an unplanned large purchase or potential fraud. Circle any red flags in your chosen highlighter colour before proceeding to deeper analysis. By quickly identifying outliers, you prioritise which sections deserve your focused attention. If you spot a ₹10,000 debit for an appliance purchase you don’t recall, you immediately know to investigate that transaction further rather than reading every small coffee purchase in detail.
Step 2 – Mark Fixed Payments
Shift focus to recurring debits: highlight rent, mortgage payments, utility bills, insurance premiums and subscription charges. Confirm that each matches the contracted date and amount. If your streaming app fee suddenly jumped from ₹299 to ₹499, mark it in a second highlighter colour (for bills) and note it as a discrepancy. These fixed payments should remain consistent month to month; any variation signals a missed contract clause or price increase you might not have authorised. By isolating fixed payments first, you quickly verify the foundation of your budget: the nonnegotiable outflows.
Step 3 – Flag the Mysteries
Every description you don’t immediately recognise – odd merchant codes, duplicate charges or unexplained foreign currency conversions – deserves a question mark in the margin. For example, a debit labelled “INTL TX-MERCH123” might be a currency conversion fee for an overseas e-commerce purchase you don’t recall. Within 60 days of the statement date, Google the merchant code or call your bank’s fraud desk to clarify. Prompt investigation prevents small unauthorised charges from ballooning into serious fraud. If you spot two ₹2,500 charges from “MYSTERY CO” and you never bought anything, freezing the card and disputing the transactions quickly could save you thousands in potential cascading thefts.
Step 4 – Total Your Fees
Add every overdraft, ATM, maintenance and foreign-transaction fee from the current statement. For instance, if you see ₹500 in ATM surcharges, ₹300 in maintenance fees and ₹200 in foreign-transaction fees, your total fees equal ₹1,000. Divide this sum by your monthly take-home pay: if you earn ₹50,000 per month, fees consume 2 percent of your income, exceeding your personal “pain threshold” of 1 percent. Consistent overspending means it’s time to set up low-balance alerts or shop for a no-fee checking account. Note that new U.S. financial regulations aim to cap overdraft fees at $5 each, but in many regions fees remain near ₹3,000 per incident†. Recognising your true cost of fees empowers you to negotiate with your bank or downgrade to a different account tier.
Step 5 – Update Your Spending Map
Finally, log every anomaly – unexpected fees, mystery charges or increased subscription rates – into your budgeting template. If dining out exceeded its budgeted envelope by ₹2,000, reduce next month’s “fun money” allocation or set a real-time debit alert for restaurant charges. After updating, reconcile your manually totalled “Ending Balance” with the bank’s reported figure: a zero variance confirms accuracy. If there’s a gap (for example, your ledger shows ₹20,000 but the bank’s closing balance is ₹19,950), revisit yesterday’s transactions to find the missing ₹50. Completing these five steps rarely exceeds ten focused minutes once you’re in the groove. Over time, your brain learns to scan faster, highlight more efficiently and catch discrepancies that once slipped by, transforming the monthly review into a painless yet powerful financial ritual.
Pro Hacks & Automation Moves
Push or SMS Alerts
Enabling push or SMS alerts transforms passive statement-checking into real-time monitoring. Most Indian banks allow you to configure notifications for any debit exceeding a threshold (for example, ₹500) or for specific merchant categories like petrol pumps. By setting an alert for petrol transactions, you immediately know when fuel charges post, preventing surprise overspending on fuel if you’ve capped your “commute” budget. Similarly, a generic debit alert for amounts over ₹500 helps catch large, potentially fraudulent withdrawals as they happen. To activate these alerts, log into your online banking portal and navigate to the “Notification Settings” or “Alerts” section. Choose “Debit Transaction” and set the threshold to ₹500 (or any amount that aligns with your spending patterns). Opt for both push notification (via the bank’s mobile app) and SMS so you receive a ping even if you’re offline. Over time, these instant triggers build a habit: instead of waiting weeks to review your statement, you react to anomalies within minutes, drastically reducing fraud exposure and minimising unnoticed fees.
OCR Tools (e.g., DocuClipper)
Optical Character Recognition (OCR) tools like DocuClipper eliminate manual data entry by converting your bank statement PDF into a structured CSV file. Simply drag and drop the statement into the tool’s interface, and it automatically parses date, description, debit/credit amounts and running balance into separate rows and columns. Once exported, import the CSV into your budget app or spreadsheet. This process saves hours each month and ensures error-free categorisation – no more mistyping “ATM Withdrawal” or overlooking a decimal point. In addition, OCR-based categorisation often recognises merchant names and can auto-assign transactions to predefined categories (rent, utilities, groceries), speeding up your “5-Step Strategy” routine. To get started, visit the OCR provider’s website (for example, finhealthnetwork.org’s recommended tools), sign up for a free or low-cost plan, and practise on a sample statement. After a few runs, you’ll refine category rules, such as merging “STREAMLYF SUBSCRIPTION” and “STREAMLYF SVCS” under “Entertainment”, which significantly improves your budget’s accuracy.
Daily Balance Snapshots
Rather than waiting until month-end, request daily balance snapshots from your bank to capture morning balances via SMS. Many banks offer a “Daily Account Summary” service: you receive a text each morning showing available balance, pending holds (if any) and the previous day’s closing ledger balance. This early-warning system alerts you to unexpected dips, such as an unrecognised ₹2,000 debit, long before the full statement arrives. To enable this, contact your branch or log into net banking and search under “Account Alerts” for “Daily Balance SMS”. Opt in and confirm the mobile number registered on your account. As soon as your inbox buzzes with a low-balance alert, you can freeze suspicious transactions, transfer funds to avoid overdraft fees or adjust daily spending to prevent surprises. Over time, these morning snapshots reveal spending trends: if you consistently see your balance dip by the 20th of each month, you might need to recalibrate budget allocations or reschedule bill payments.
Quarterly “Statement Audit” Calendar Reminder
Even the most sophisticated automation benefits from human oversight. Block a recurring calendar slot every quarter; label it “Statement Audit”. This reminder ensures you don’t skip deeper reviews, such as checking for small-but-cumulative fees or verifying annual interest rate changes. Choose a date shortly after each quarter-end (for example, April 5, July 5, October 5, or January 5) and allocate 15 minutes to run through the “5-Step Strategy” using OCR-generated spreadsheets and balance snapshots. On that date, compare quarterly fee totals (derived from your budget app) against your bank’s annual fee summary; if there’s a discrepancy, call customer service to reconcile. Additionally, use this quarterly check to confirm that no new service fee changes have slipped into the fine print. By spreading these audits across four points in the year, you avoid the year-end rush and maintain consistent oversight, preventing “creeping fees” from accumulating unnoticed.
FAQ – People Also Ask
What information should I look for first on a bank statement?
Begin by verifying the statement period and matching the “Opening Balance” to last month’s “Closing Balance”. Next, scan the ledger for large debits (typically anything over 20 percent of your monthly income) and watch for negative balances. This initial triage surfaces urgent matters, like an overdraft fee or an unrecognised large purchase, before you delve into detailed category checks.
How often should I review my bank statements?
At a minimum, review statements monthly, ideally within 48 hours of the statement date. Combine this with ad-hoc checks whenever your balance-alert SMS or push notification pings. Real-time alerts catch anomalies within hours, while the formal monthly review confirms no hidden charges lurk in the fine print.
What is the difference between “statement balance” and “current balance”?
The “Statement Balance” is fixed as of the closing date and includes all transactions posted during that cycle. The “Current Balance” continuously updates with new transactions (including those after the cycle ends) and pending holds. Use the “Statement Balance” for reconciliations; rely on the “Current Balance” to plan immediate spending.
How can I spot fraudulent transactions quickly?
Leverage pattern recognition: watch for odd merchant names, repeated micro-charges (often $0.99 test charges) and foreign-currency codes (e.g., “INTL TX”). Pair this with real-time alerts so you catch anomalies within hours rather than waiting weeks. If a suspicious debit appears, freeze your card and initiate a dispute within 60 days to maximise your chances of a full refund.
How long should I keep my bank statements?
Keep digital or paper copies for at least 12 months for routine reference. Retain statements for up to seven years if they support tax filings, loan applications or large asset purchases. Many banks store PDFs online for five to seven years, but downloading and archiving them separately ensures you maintain access even if the bank’s portal changes.